Do you like optical illusions, or images where one things appears to be another?
Well I have always liked them, simple images that look like a rabbit or a duck depending which way you look at it. Always fascinated me how the brain can be tricked into seeing things that are not there, or seeing things that appear to be something else.

Two santas looking at each other, or a single santa?
There is an annual competition for the best optical illusion of the year - see OPTICAL ILLUSION OF THE YEAR and there are some amazing things there.
I have played around with some previously based on other illusions, like the santa image on the right. This is based on the candlestick illusion, and someone had done a version with a single face behind it that gave the ambiguous effect. This was my attempt at a version.
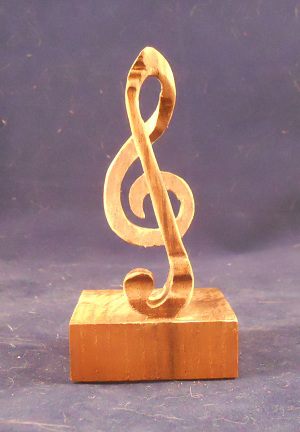


Above you can see a small carving of what looks like a harp from one direction and a treble cleff from another. This was originally cut from a block, with the shape running all the way through. It was fairly simple to then remove as much of the wood as I dared to give the object above.
Other illusions that have always interested me are those using text, whether it be wordles where a shape is filled with words in different fonts and sizes or Ambigrams where the word is different from different viewpoints,.. There are a number of websites that you can use to generate these and looking on sites like etsy you can find artists who will make them for you.
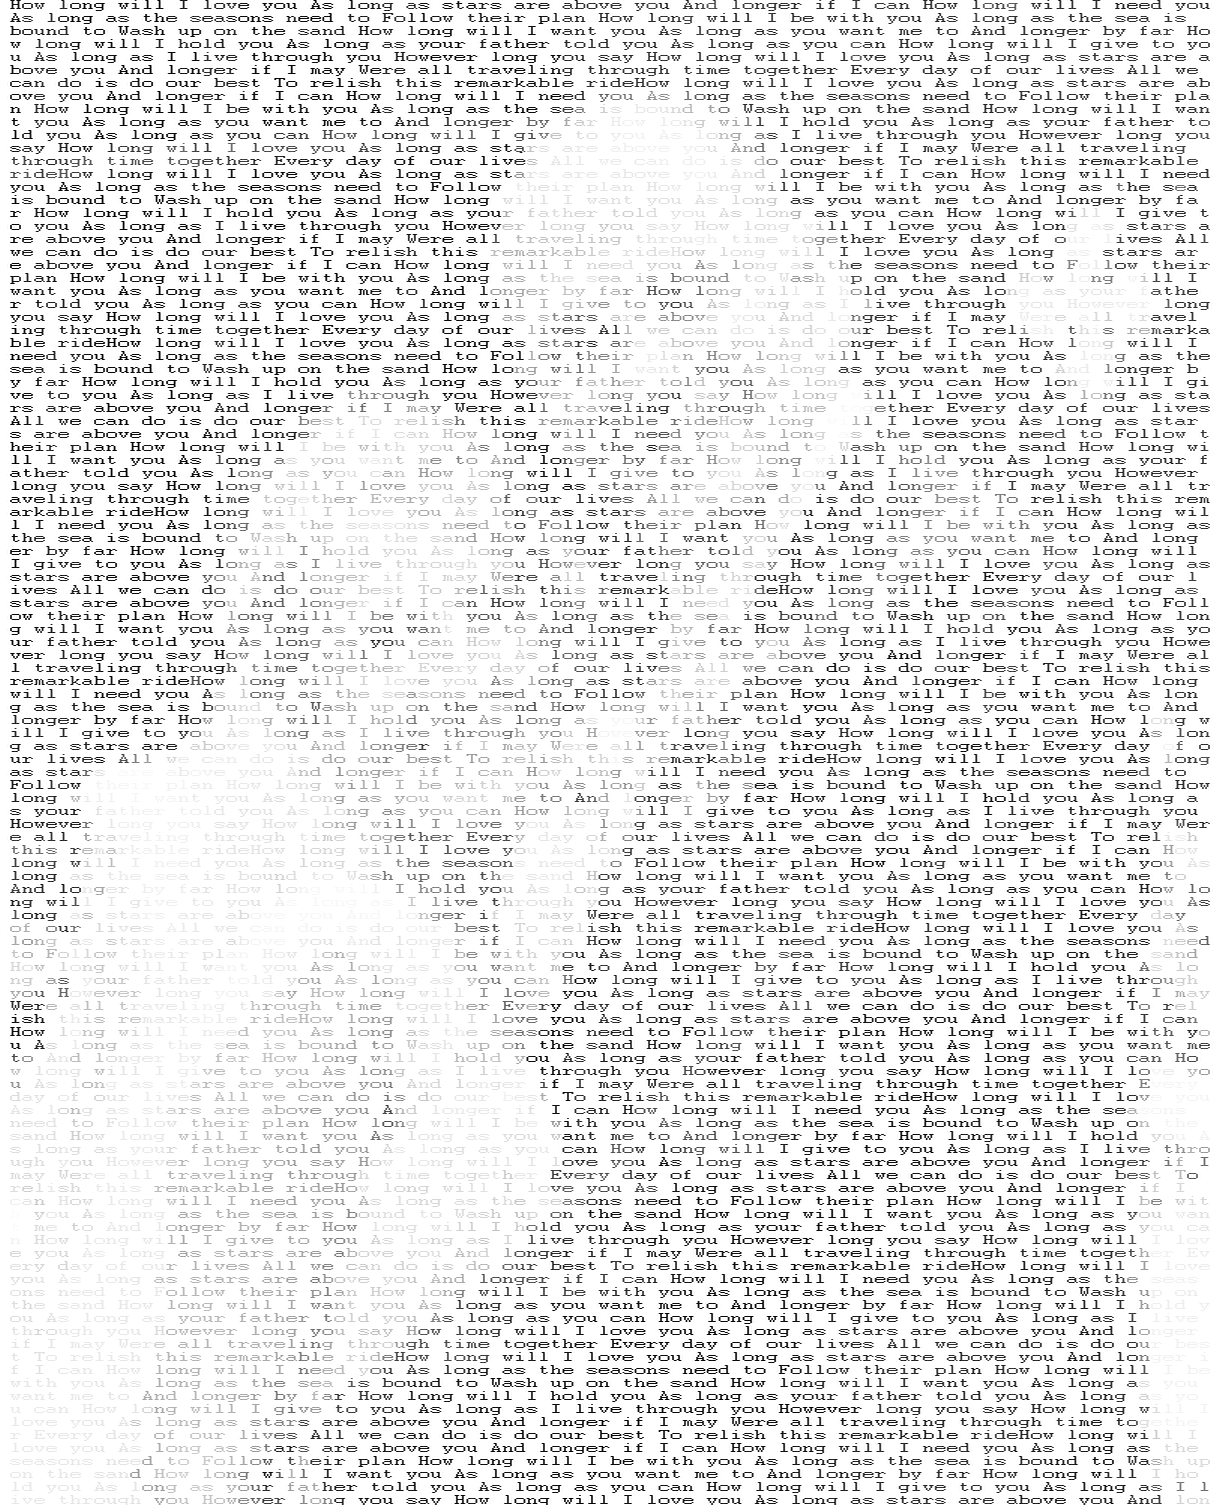
However, I had not seen one particular type of illusion being generated. This is a section of text with an image 'hidden' in it. Either by using different colours, bold, italic or some other effect. So I decided to have a go at creating my own using Python. As it turns out it was very simple to do. There are a number of libraries for processing images (CV2) and then using the array functions in numpy it proved a simple programming task to achieve t.he desired effect.
So here is how I did it;
1. Import the image using the cv2 library which creates an array of pixels.
2. create a similar array using text repeating to fill an array the same size as the image
3. apply an effect based on the pixels to the text, either the colour, or if monochrome, make the letter bold in each 'texel' (I just made that up - apologies!). I did this using html as it is easy to apply different effects using css or simply adding the format.
However, I did find that the ratio of pixel to 'texel' was a bit off, and had to stretch the text by 50% horizontally. Below you can see the original image and the text result. The image is best reduced to a small number of pixels, otherwise the text is too big to display easily. 100 pixels will fit onto an A4 sheet when the text is size 4 font.

Python makes this very simple to do, however, the CV2 library does give colours in BGR format, which is RGB reversed for some reason. The first time the program ran, the colours were very odd, a bit Andy Warhol-ish. Something to explore later I think.
suggestions for other effects welcome - I am working on making the program a bit more interactive, rather than editing the script every time.
